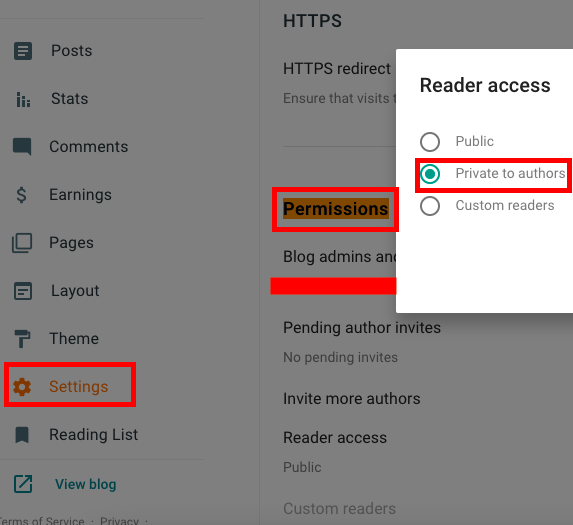
Follow the below steps to make your Blogger Site Private.
1. Go to Settings.
2. Go to Permissions Section.
3. Select Reader Access and set “Private to authors” instead of Public.
Follow the below steps to make your Blogger Site Private.
1. Go to Settings.
2. Go to Permissions Section.
3. Select Reader Access and set “Private to authors” instead of Public.
1. Select the contents from the Blogger Post.
2. Copy the selected contents.
3. Go to Google Docs.
4. Create a new Document.
5. Paste the Selected Contents.
6. In the Google Document, select all the contents.
7. In the WordPress Post, paste the contents.
8. After pasting, select each image and select “Upload external image”. This will download the image from Google, store it in your Host and replace it with the image stored.

1. Install the “Htaccess File Editor” Plugin.

2. Select “Edit Htaccess“.
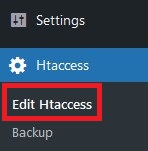
3. Take a back up of the Htaccess file. This is very important step if something goes wrong.
4. Add the following code just below the RewriteBase / line:
RewriteCond %{QUERY_STRING} ^m=1$
RewriteRule (.*) $1? [R=permanent]

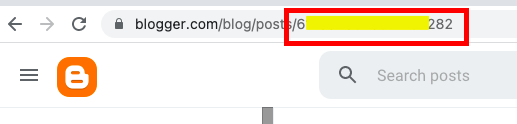
1. Login into https://www.blogger.com/.
2. Select the Blog for which you want to get the Blogger Id.
3. On the URL, you can find the Blogger Id at the end.
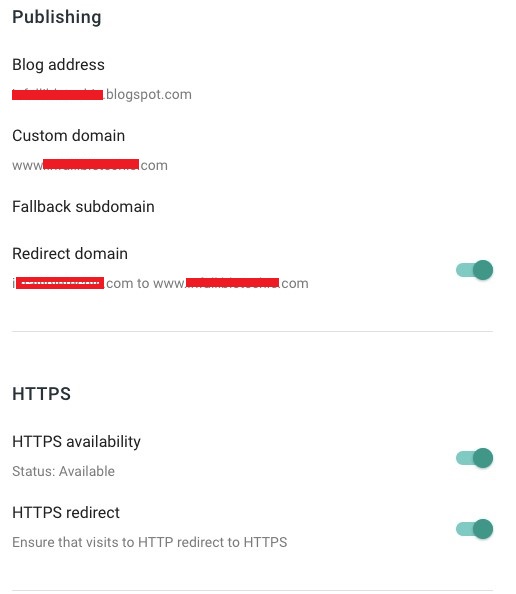
1. Go to Blogger Settings.
2. Update Custom Domain and Redirect domain. Enable HTTPS availability and HTTPS redirect.
3. In GoDaddy, add the DNS Records.

Effortless Customization: A Step-by-Step Guide to Changing Your Cursor Color Theme Are you tired of the same old cursor on your screen? Do y...


