We can easily setup Table of Contents in Google Documents. Please make use of the following steps for your reference:
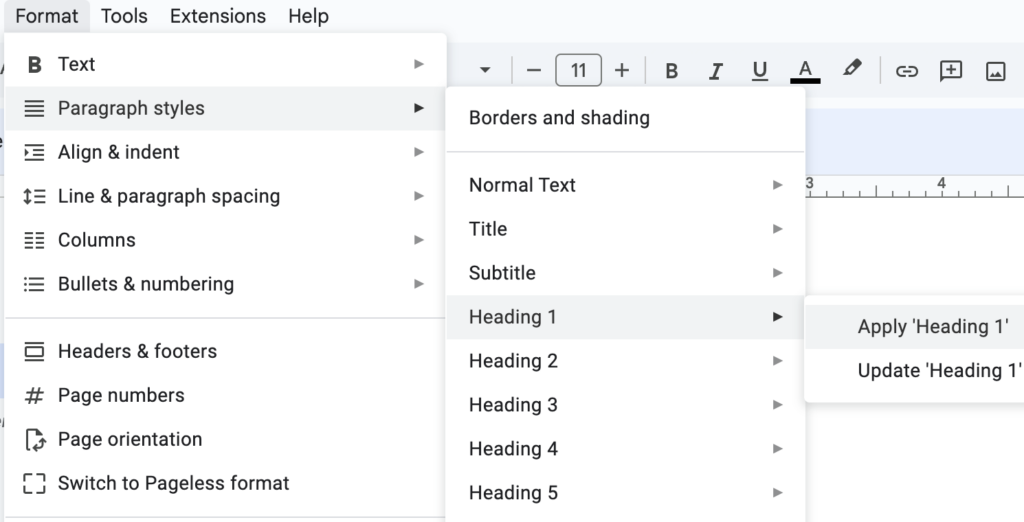
1. For all the Titles, use Format –> Paragraph styles –> Heading 1 or your choice of selection. This steps should be done for all the Titles to be included in the Table of Contents.
Note:
Please avoid using this step 1 for other text contents in your Google Documents.
2. Use Insert –> Table of contents to insert the Table of Contents in your Google Documents. The Table of Contents will make use of all the titles used in the Step 1.
If you are looking for cover page for your Google Document or fit an Image to an entire page, you can use the following steps:
1. If you have already created your document, use Page Break.
2. Go to the first page.
3. Select Insert –> Headers & Footers –> Header.
4. Use or enable “Different first page” option.
5. Go to the Body of the document in the first page.
6. Insert the image. Please don’t insert the image on the Header. It should be inserted on the Body.
7. Select the Image and click the Image Options.
8. Use “Behind text” and “Fix position on page” options. You can expand the image to fit. You can also add text, images, etc. The image will work as a Background to the first page of the Google Document.